With this chart please feel free to use as you wish, all I ask is that you do not use this chart for profit as You nor I own the rights to make and sell Pokémon products.
Saturday, 16 July 2016
Free Pokéball Knitting Chart
Now I know everybody is obsessed with Pokémon Go right now but as it's been down all day today I needed to occupy myself other Pokémon activities. So here's a colour chart for all you knitters out there with server issues, I'm envisioning at least one pair of pokéball socks for myself!
This chart was created using the Tricksy Knitter website.
With this chart please feel free to use as you wish, all I ask is that you do not use this chart for profit as You nor I own the rights to make and sell Pokémon products.
Tuesday, 19 May 2015
Raw cinnamon energy balls.
By now you've probably heard of 'Energy Balls' they're all over the internet and they are really really amazing! Not only are they completely delicious but they're actually healthy, gluten free and vegan! Energy balls are made from raw fruit and nuts and because of that they are packed full of nutrition and flavour! They're great to deal with that sweet tooth without breaking into other treats filled with saturated fats and empty calories, so can be helpful with weight loss.
This recipe took a fair amount of tweaking but I've finally perfected them and they are divine They're a huge hit with my work colleagues and I really can't make enough of them.
This recipe is for 200 grams as I've found that is the best amount to work with my blender.
You will need: (makes approx 20 balls)
80g Dates
80g Cashews
36g Raisins
4g Cinnamon powder
Simply place all of the ingredients into a blender or a food processor and blend them until you reach your desired consistency, I like mine to be pretty smooth but it really is personal preference, you just want them to be blended enough to be able form together without breaking apart.
Now that you have your ingredients all blended up you just need to roll your mixture into balls. This is the longest part of the process and something I imagine kids would love.
After this pop them into a container and refrigerate them for at least half an hour, this just helps them set into their shape a little bit. and then you're good to go!
Thursday, 5 March 2015
What's been on my wheel?
I'm absolutely in love with spinning and dyeing wool ever since I bought my spinning wheel, I love playing with different textures and different breeds of wool, my favourite so far is Blue Faced Leicester.
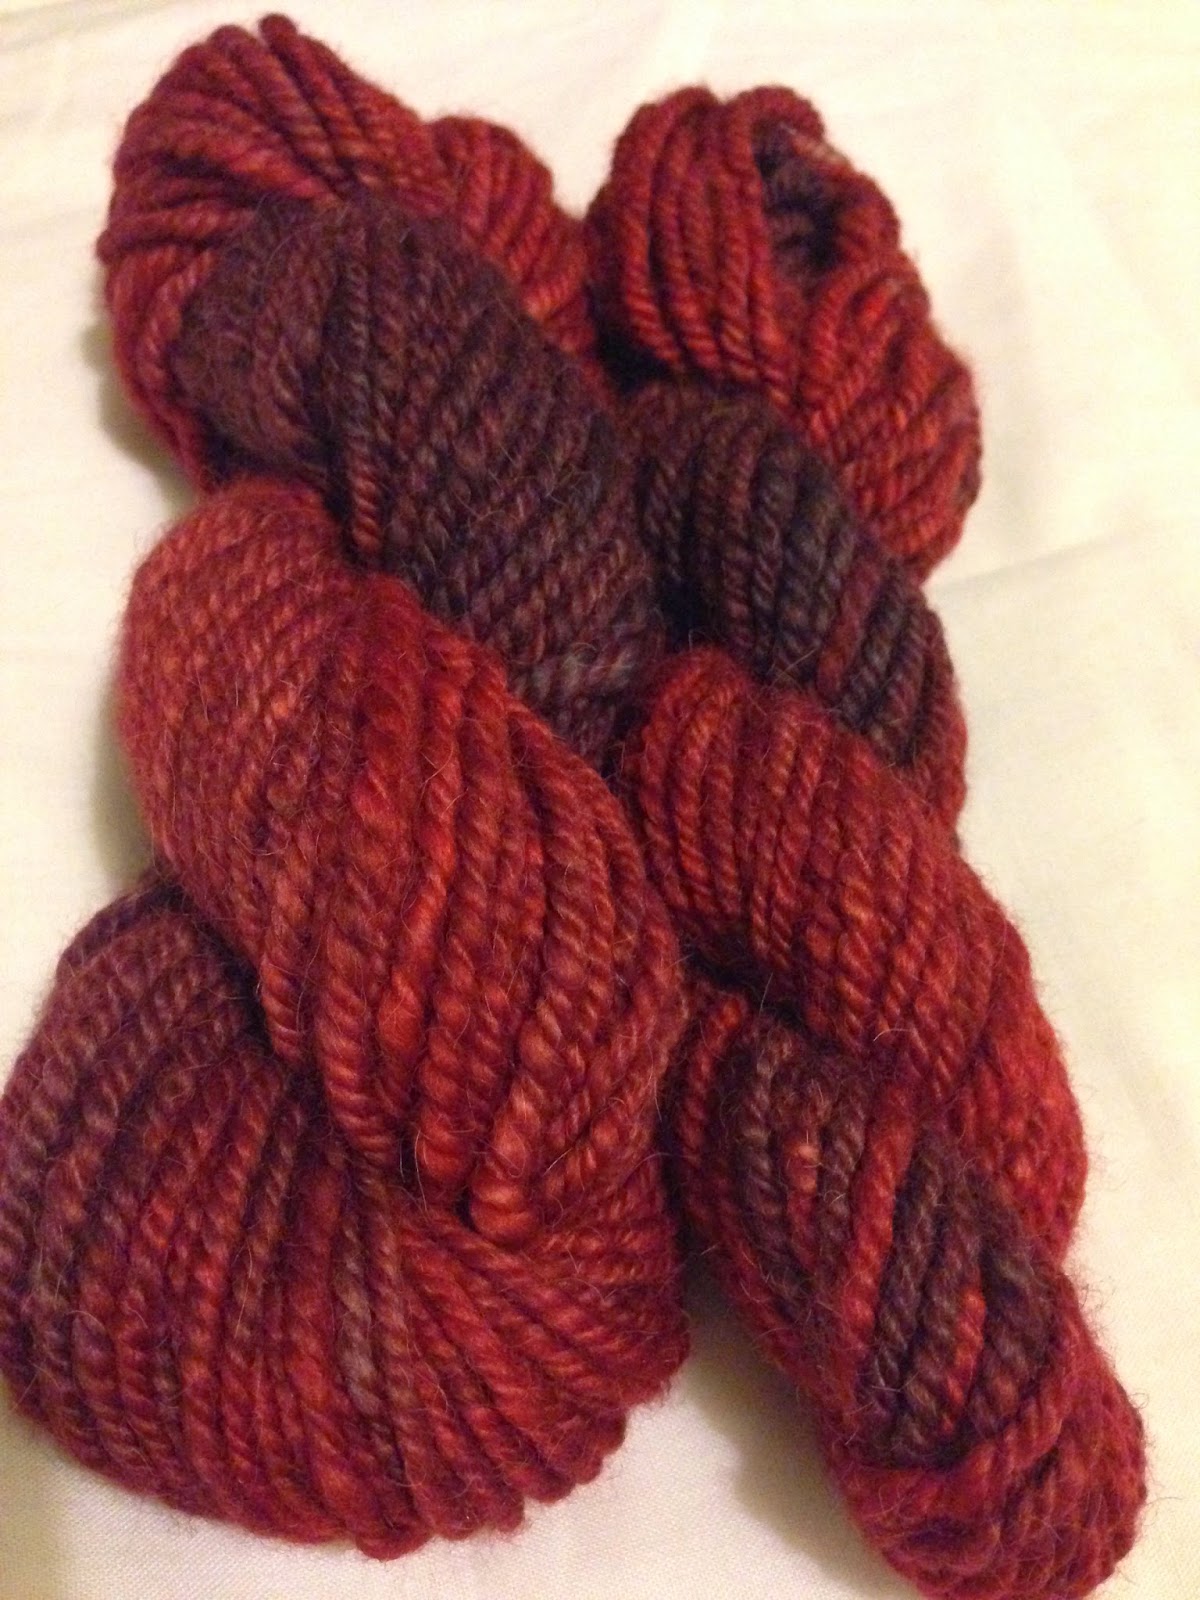
Here's what I've been working on recently. All hand spun and all hand dyed (using food colouring and white vinegar)
Wednesday, 3 July 2013
Spinning Fun!
Recently, I've taken up spinning yarn! Currently I'mjut working with a drop spindle though I recently forked out and bought an actual spinning wheel. The price definitely stings but I think it will be worth it.
I figured I'd share my work so far.
This is 100% merino wool in a lovely mint green dye, in this picture you can see a partially spun ply on my drop spindle
And here is a little test swatch I knitted, I really like the yarn and the texture and character it has, IMO it definitely adds something to the finished piece.
.jpeg)
This is the wheel I've purchased, It's a Kromski Prelude, I bought it from Wingham Wool Work.
It should arrive tomorrow and I'm super excited!
Sunday, 5 May 2013
Free Star Decoration Pattern
Here's a pattern Iwrote about two years ago that I never posted :) bear in mind it is very old so not that great but I guess it does what it says on the tin.
Today my lovelies i bring you a free pattern for the above stars.
You could use them as coasters, hang them as decoration or join them together like in the below picture and make a cute decorative blanket like I plan to :)
Materials:
2.75 mm (Size C usa) Crochet Hook
DK yarn I used robin DK
Tapestry needle (or any needle with an eye big enough for yarn)
Stitch Abbreviations:
SS - Slip Stitch
Ch - Chain
SC - Single Crochet
DC - Double Crochet
Pattern:
Create a slipknot on your hook.
Ch 6 and slip stitch into the furthest Ch from the hook.
Ch 2, 9 DC, SS into the Ch 2.
Ch 2, work one DC into the same space as the Ch 2, *Ch 5 and SS into the third Ch from the hook Ch2 then skip one DC then work 2 DC's into the next DC* repeat from* until you finish the 5th 'Ch 5 and SS into the third Ch from the hook Ch2' then SC into the top of the starting Ch2.
SC into the first DC, SC into the next 2 Ch, SC into the gap made by the Ch3 loop. (SC Ch1, DC SC) into the two loops at th top of the Ch3 loop. Continue going round the star like this until you're finished.
Thursday, 2 May 2013
Update
Just another update. It's been quite I while since my last post.
I've been taking more interest into jewellery making (as pictured below) and I've decided I want to take my crafts further than just a hobby. I'm also planning on starting to sell some crochet patterns along with jewellery. I've made some good connections which have been a great help in getting started!
I've already sold one crocheted item to somebody other than my close friends which was a great ego boost! Although I'm just getting started out and I'm taking things slowly I'm definitely heading in the right direction.
Also this is my first post via the blogger app which I'm not too sure how I feel about it. It is more convenient as the majority of the time when I use the Internet is on my iPhone or iPad where the web version isn't too compatible but the app I'm feeling Is a bit awkward.
I've been taking more interest into jewellery making (as pictured below) and I've decided I want to take my crafts further than just a hobby. I'm also planning on starting to sell some crochet patterns along with jewellery. I've made some good connections which have been a great help in getting started!
I've already sold one crocheted item to somebody other than my close friends which was a great ego boost! Although I'm just getting started out and I'm taking things slowly I'm definitely heading in the right direction.
Also this is my first post via the blogger app which I'm not too sure how I feel about it. It is more convenient as the majority of the time when I use the Internet is on my iPhone or iPad where the web version isn't too compatible but the app I'm feeling Is a bit awkward.
Sunday, 16 December 2012
Free Christmas Pudding Crochet Pattern
My last post has generated a lot of attention which is great! This has been my busiest month since I started my blog and we're barely into December!
This is a pattern for a christmas pudding, about a month ago a lady in my work asked me to make her a christmas pudding to decorate her desk in the office, I have since crocheted two others as so many people want them!
Materials:
3.5 mm/E crochet hook
2.75 mm/C crochet hook
Wide eyed needle
Brown DK yarn
White DK yarn
Small amount of red DK yarn
Small amount of green DK yarn
Stuffing
Stitch Abbreviation:
Ch - Chain stitch
Sc - single crochet
ScInc - two single crochet in one stitch
Sc2Tog - single crochet two stitches together (decrease)
Ss - slip stitch
Picot - chain three, slip stitch in the first chain loop.
The Pattern:
using your 3.5mm / E hook
In Brown
Make a magic loop
Round 1: Sc6
Round 2: ScInc in each stitch
Round 3: ScInc in the first stitch, Sc next stitch. Repeat to the end of the round
Round 4: ScInc in the first stitch, Sc 1. Repeat to the end of the round
Round 5: ScInc in the first stitch, Sc 2. Repeat to the end of the round
Round 6: ScInc in the first stitch, Sc 3. Repeat to the end of the round
Round 7: ScInc in the first stitch, Sc 4. Repeat to the end of the round
Round 8: ScInc in the first stitch, Sc 5. Repeat to the end of the round
Round 9: ScInc in the first stitch, Sc 6. Repeat to the end of the round
Round 10: ScInc in the first stitch, Sc 7. Repeat to the end of the round
Round 11: ScInc in the first stitch, Sc 8. Repeat to the end of the round
Round 12: Sc in each stitch.
Round 13: Sc in each stitch.
Round 14: Sc in each stitch.
Round 15: Sc in each stitch.
Round 16: Sc in each stitch.
In white:
Round 17: Sc in each stitch. In this round I used spike stitch around in no particular order, making clusters of spikes in some areas and more sparce in other areas, not limiting to the row imediately below the current but also two rows and someties even three rows below the current.
Round 18: Sc in each stitch.
Round 19: Sc in each stitch.
Round 20: Sc2Tog, Sc 8. Repeat to the end of the round
using your 2.75mm / C hook
This is a pattern for a christmas pudding, about a month ago a lady in my work asked me to make her a christmas pudding to decorate her desk in the office, I have since crocheted two others as so many people want them!
Materials:
3.5 mm/E crochet hook
2.75 mm/C crochet hook
Wide eyed needle
Brown DK yarn
White DK yarn
Small amount of red DK yarn
Small amount of green DK yarn
Stuffing
Stitch Abbreviation:
Ch - Chain stitch
Sc - single crochet
ScInc - two single crochet in one stitch
Sc2Tog - single crochet two stitches together (decrease)
Ss - slip stitch
Picot - chain three, slip stitch in the first chain loop.
The Pattern:
In Brown
Make a magic loop
Round 1: Sc6
Round 2: ScInc in each stitch
Round 3: ScInc in the first stitch, Sc next stitch. Repeat to the end of the round
Round 4: ScInc in the first stitch, Sc 1. Repeat to the end of the round
Round 5: ScInc in the first stitch, Sc 2. Repeat to the end of the round
Round 6: ScInc in the first stitch, Sc 3. Repeat to the end of the round
Round 7: ScInc in the first stitch, Sc 4. Repeat to the end of the round
Round 8: ScInc in the first stitch, Sc 5. Repeat to the end of the round
Round 9: ScInc in the first stitch, Sc 6. Repeat to the end of the round
Round 10: ScInc in the first stitch, Sc 7. Repeat to the end of the round
Round 11: ScInc in the first stitch, Sc 8. Repeat to the end of the round
Round 12: Sc in each stitch.
Round 13: Sc in each stitch.
Round 14: Sc in each stitch.
Round 15: Sc in each stitch.
Round 16: Sc in each stitch.
In white:
Round 17: Sc in each stitch. In this round I used spike stitch around in no particular order, making clusters of spikes in some areas and more sparce in other areas, not limiting to the row imediately below the current but also two rows and someties even three rows below the current.
Round 18: Sc in each stitch.
Round 19: Sc in each stitch.
Round 20: Sc2Tog, Sc 8. Repeat to the end of the round
Round 21: Sc2Tog, Sc 7. Repeat to the end of the round
Round 22: Sc2Tog, Sc 6. Repeat to the end of the round
Round 23: Sc2Tog, Sc 5. Repeat to the end of the round
Round 24: Sc2Tog, Sc 4. Repeat to the end of the round
Round 25: Sc2Tog, Sc 3. Repeat to the end of the round
Round 26: Sc2Tog, Sc 2. Repeat to the end of the round
Round 27: Sc2Tog, Sc 1. Repeat to the end of the round
Round 28: Sc2Tog to the end of the round.
Make sure your pudding is firmly stuffed and sew up :)
using your 2.75mm / C hook
Berries: (make 2)
In Red
Make a magic ring
Round 1: Sc 6 in the ring
Round 2: Sc around.
sew up and sew very close to each other near the centre of the top of the pudding
Leaves:
Ch 12, sc in the second loop for the hook, sc 6, picot, sc2, picot, sc2, picot.
Now you'll be turning to the other side of the leaf.
Sc 2, Picot, Sc 2, Picot, Sc 6. finish off, and sew in any loose ends.
Now once you've sewn everything together your christmas pudding is finished!
As always If you come accross any issues or errors in this pattern please let me know!
you can contact me:
Here!
www.facebook.com/kimurakraft
www.twitter.com/markuskimura
Sunday, 9 December 2012
Crocheted Poppy Appeal Update.
A few post back I mentioned I was crocheting poppies for Remembrance Day. I just wanted to let those who are interested that I raised £65. Instead of donating it to the poppy appeal charity, we decided to donate it to the Erskine Charity which has been caring for veterans since 1916.
For more information on the Erskine charity please visit www.erskine.org.uk
Tuesday, 4 December 2012
Free Crochet Christmas Tree Pattern.
This will be the first free pattern I've posted in a long time. I've been so excited for christmas this year, but more for getting to decorate things! I feel this pattern totally blows any pattern I've ever posted before out of the water.
I decided I wanted to put a tree on my desk in work and came up with this little cutie!
Materials:
3.5 mm/E crochet hook
2.75 mm/C crochet hook
Red DK yarn
Black DK yarn
Brown DK yarn
Green DK yarn
Green thread
Yellow DK yarn
Various coloured beads (you'll need about 40 - 50)
Something to weight the bottom with.
Stitch translation:
BLO - Back loop only
FLO - Front Loop Only
SC - Single Crochet
SCDEC - single crochet decrease
Using your 3.5 mm hook
I decided I wanted to put a tree on my desk in work and came up with this little cutie!
Materials:
3.5 mm/E crochet hook
2.75 mm/C crochet hook
Red DK yarn
Black DK yarn
Brown DK yarn
Green DK yarn
Green thread
Yellow DK yarn
Various coloured beads (you'll need about 40 - 50)
Something to weight the bottom with.
Stitch translation:
BLO - Back loop only
FLO - Front Loop Only
SC - Single Crochet
SCDEC - single crochet decrease
Using your 3.5 mm hook
In red.
make a magic ring
Round 1: sc6
Round 2: 2sc in each stitch
Round 3: 2sc in first stitch sc next, repeat to the end of the row
Round 4: 2sc in first stitch sc next 2, repeat to the end of the row
Round 5: 2sc in first stitch sc next 3, repeat to the end of the row
Round 6: sc blo around
Round 7: sc around
Round 8: sc around
Round 9: sc around
Round 10: 2sc in first stitch 14sc, 2sc next stitch, 14 sc
Round 11: sc around
Round 12: 6sc, 2sc next stitch, 15sc, 2sc next stitch, 9 sc
Round 13: sc around
Round 14: 12sc 2,2sc next stitch, 16sc, 2sc next stitch, 4sc
Round 15: sc around FLO
At this point weigh down the pot and stuff, and stuff as you go along the pattern.
In black
Round 16: scdec 4sc, repeat to the end of the row
Round 17: scdec 3sc, repeat to the end of the row
Round 18: scdec 2sc, repeat to the end of the row
In brown
Round 19: sc around
Round 20: sc around
Round 21: sc around
In green
Round 22: 2sc in first stitch sc next 2, repeat to the end of the row
Round 23: 2sc in first stitch sc next 3, repeat to the end of the row
Round 24: 2sc in first stitch sc next 4, repeat to the end of the row
Round 25: 2sc in first stitch sc next 5, repeat to the end of the row
Round 26: 2sc in first stitch sc next 6, repeat to the end of the row
Round 27: 2sc in first stitch sc next 7, repeat to the end of the row
Round 28: 2sc first stitch, sc next 8, repeat to the end of the row
Round 29: sc around
Round 30: BLO, scdec, sc 28, scdec, sc 28
Round 31: BLO sc 9, scdec, sc 27, scdec, sc 18.
Round 32: BLO sc 18, scdec, sc 26, scdec, sc8.
Round 33: BLO, scdec, sc 25, scdec, sc 25.
Round 34: BLO sc 8, scdec, sc 24, scdec, sc 16.
Round 36: BLO sc 16, scdec, sc 23, scdec, sc 7.
Round 35: BLO sc around
Round 37: BLO scdec, sc 22, scdec, sc 22.
Round 38: BLO sc 7, scdec, sc 21, scdec, sc 14.
Round 39: BLO sc 14, scdec, sc 20, scdec, sc 6.
Round 40: BLO scdec, sc 19, scdec, sc 19.
Round 41: BLO sc 6, scdec, sc18, scdec, sc12.
Round 42: BLO sc12, scdec, sc17, scdec, sc5.
Round 43: BLO sc around
Round 44: BLO scdec, sc 16, scdec, sc 16.
Round 45: BLO sc 5,scdec, sc 15, scdec, sc 10.
Round 46: BLO sc 10, scdec, sc 14, scdec, sc 4.
Round 47: BLO scdec, sc 13, scdec, sc 13.
Round 48: BLO sc 4, scdec, sc 12, scdec, sc 8.
Round 49: BLO sc 8, scdec, sc 11, scdec, sc 3.
Round 50: BLO scdec, sc 10, scdec, sc 10.
Round 51: BLO sc 3, scdec, sc 9, scdec, sc 6.
Round 52: BLO sc 6, scdec, sc 8, scdec, sc 2.
Round 53: BLO scdec, sc 7, scdec, sc 7, scdec.
Round 54: BLO sc 2, scdec, sc 6, scdec, sc4.
Round 55: BLO sc 4, scdec, sc 5, scdec, sc 1.
Round 56: BLO scdec, sc 4, scdec, sc 4.
Round 57: BLO sc 1, scdec, sc 3, scdec, sc 2.
Round 58: BLO sc 2, scdec, sc 2, scdec.
Branches:
For the branches I threaded my beads onto the green thread and then formed a slipknot with the thread and green yarn together. I then worked slip stitches (SS) into the loops left by working in BLO in the main body of the tree, and made the branches by using a picot stitch. To work the picot stitch:
Chain 3, and slip stitch into the third chain from the hook, to add a bead to a branch bring a bead up and work it into the second chain.
To make the star I used the smaller crochet hook and a pattern from Inner Child Crochet which can be found HERE. The pattern shows three different sizes, I used the smallest size.
Now that your'e finished crocheting, take a few minutes to sew in any loose ends and show off your new decoration with pride!
I'm still new to writing up my patterns so if you encounter any problems please let me know!
Branches:
For the branches I threaded my beads onto the green thread and then formed a slipknot with the thread and green yarn together. I then worked slip stitches (SS) into the loops left by working in BLO in the main body of the tree, and made the branches by using a picot stitch. To work the picot stitch:
Chain 3, and slip stitch into the third chain from the hook, to add a bead to a branch bring a bead up and work it into the second chain.
To make the star I used the smaller crochet hook and a pattern from Inner Child Crochet which can be found HERE. The pattern shows three different sizes, I used the smallest size.
Now that your'e finished crocheting, take a few minutes to sew in any loose ends and show off your new decoration with pride!
I'm still new to writing up my patterns so if you encounter any problems please let me know!
Tuesday, 6 November 2012
Crocheted poppy appeal
Recently in work I have been asked to crochet things for various charities, which I love! I've been thinking to myelf for a while that I'd like to do something craft related for charity, but I've been struggling for ideas.
I'm very happy and proud of these opportunities for two main reasons; It's for great causes, I'm using my skills to help people in need, I can do what I love but with a greater purpose. The other reason is being requested to do this gives me a a huge sense of approval and validation, a lot of people are amazed at my skills (even more so due to my age and sex.) It feels great to get some gratitude and appreciation every now and then , and these projects give me just that, the sense that, my work is good enough.
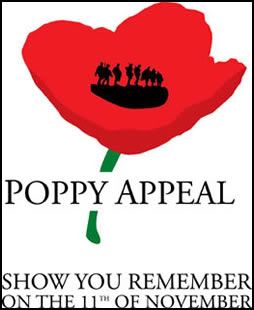
The latest charity project I've been working on is The Poppy Appeal, which is a annual campaign held on the run up to November the 11th, Remembrance Day, or as it is known in the USA, Veterans Day.
Here in Britain every year poppy pins are sold everywhere and all money raised goes to The Royal British Legion charity. The Royal British Legion is a leading UK charity providing support to the serving and ex-Service community and their families.
So this year instead of the usual paper poppies bought I've been crocheting as many as I possibly can and selling them in work for the The Poppy Appeal and so far I can't make enough they're a real hit!
I'll post the two patterns I have been using shortly, should you wish to get in on the action for if you just want to make poppies.
I'm very happy and proud of these opportunities for two main reasons; It's for great causes, I'm using my skills to help people in need, I can do what I love but with a greater purpose. The other reason is being requested to do this gives me a a huge sense of approval and validation, a lot of people are amazed at my skills (even more so due to my age and sex.) It feels great to get some gratitude and appreciation every now and then , and these projects give me just that, the sense that, my work is good enough.
The latest charity project I've been working on is The Poppy Appeal, which is a annual campaign held on the run up to November the 11th, Remembrance Day, or as it is known in the USA, Veterans Day.
Here in Britain every year poppy pins are sold everywhere and all money raised goes to The Royal British Legion charity. The Royal British Legion is a leading UK charity providing support to the serving and ex-Service community and their families.
So this year instead of the usual paper poppies bought I've been crocheting as many as I possibly can and selling them in work for the The Poppy Appeal and so far I can't make enough they're a real hit!
I'll post the two patterns I have been using shortly, should you wish to get in on the action for if you just want to make poppies.
Friday, 17 February 2012
The Basic Guide To crocheting Stuffed Toys (Amigurumi)
Here is my basic to guide to creating crocheted stuffies. In this guice I will aim to teach you how the create the magic ring (magic loop, amigurumi ring etc.) and go on to tell you how to crochet a stuffed ball.
To begin you will need only three things;
Yarn - you can use any yarn you want, for this I'm using robins DK
A crochet hook - For this I'm using a 4.5mm (US G/H) though I would normally use 3.5 mm or 2.5mm (US C or E)
Stuffing - I'm using a synthetic fiber to stuff you could use anything fluffy really, though polyfil gets the job done and is cheap too :)
First off you'll want to learn how to create the magic ring (there is other ways to start but as I said this is my guide :P)
I've found a quick video showing how to do so:
Basically you just wrap your arn around your two fingers twice,
place your hook under the two loops,
wrap the yarn over the hook pull through the two loops in your fingers,
wrap the yarn over the hook and and pull through,
this is your magic ring:
From here you will then proceed to make 6 Single Crochet stitches into the magic ring and pull the end of the yarn, not attatched to the ball tight, resulting in this:
From here we shall continue to make the ball:
you should currently have 6 stitches in the ring, amigurumi is normally worked in a spiral, so no stopping at the end of rounds, thus after finishing the last stitch of a round you would then just stitch into the next.
round 2: work 2 sc into each of the 6 sc in the starting ring, making 12 stitches
Round 3: Work 1 sc into the first stitch, work 2 sc into the next stitch repeat in this pattern to the end of the round making 18 stitches.
Round 4: Work 1 sc into the first 2 stitches, work 2 sc into the next stitch, repeat in the pattern to the end of the round, making 24 stitches.
Round 5: SC into each stitch around
Round 6: SC into each stitch around
Round 7: SC into each stitch around
Round 8: SC into each stitch around
Round 9: SC into each stitch around
Round 10: work 1 SC into the first two stitches, work one SCDEC over the next 2 stitches, repeat in this pattern until the end of the round making 18 stitches
Round 11: work 1 SC into the first stitch, work one SCDEC over the next 2 stitches, repeat in this pattern until the end of the round making 12 stitches
Round 12: SCDEC into every stitch making 6 stitches
Now cut the yarn and tie off leaving a long tail of yarn, sew the final 6 stitches together to close the hole, poke the yarn through the middle of the ball, trim the excess and you're done! you've completed a crocheted ball.
What you do with this ball is up to you, you could sew a face on it, glue felt to it , make ears or legs.
This is the first thing I think anybody should learn whilst learning to create amigurumi.
I hope this helped a lot! if you have any questions or suggestions leave a comment or email me at kimurakraftmail@gmail.com
Friday, 28 October 2011
Free Pumpkin Crochet Pattern
I've been Incredibly excited about halloween since may! And i decided I needed some some crocheted spooky decor! so here is what could be the first installment of a few I mean i know halloween is VERY soon, but who say's i have to be spooky for one day a year only?
I hope you Enjoy this pattern :) I like the addition of the FPDC as it gives a nice ridged effect :). Happy Halloween everybody!
Also I have a youtube account now and Plan to make basic tutorial videos like the FPDC stitch for example. I'll keep you's updated :)
As you can see I may have slightly botched the face, i decided to try my hand a gluing felt to the finished project.. as you can tell it did not go so well.. next time I think I'll stick to needle felting or sewing...
so here goes!
I used Robins DK yarn and a 3.5mm (USA - E) crochet hook, for a really dainty and cute pumpkin you could use a 2.75mm (USA - C) hook also.
Abbreviations:
SC - Single crochet
FPDC - Front post double crochet
In Orange
1: 6sc in magic ring
2: *2 sc each (12 stitches)
3: *(2 sc first stitch)FPDC. Repeat from * (18 stitches)
4: *(2 sc 1st stitch) 1 sc, fpdc. Repeat from *(24 st)
5: *(2 sc 1st stitch) 2 sc, fpdc. Repeat from * (30 st)
6: *(2 sc 1st stitch) 3 sc, fpdc. Repeat from * (36 st)
7: *5 sc FPDC. Repeat from * (36 st)
8: *5 sc FPDC. Repeat from * (36 st)
9: *5 sc FPDC. Repeat from * (36 st)
10: *5 sc FPDC. Repeat from * (36 st)
11: *(sc dec) 3sc, fpdc. Repeat from * (30 st)
12: *(sc dec) 2sc, fpdc. Repeat from * (24 st)
13: *(sc dec) 1sc, fpdc. Repeat from * (18 st)
14: *(sc dec) fpdc . Repeat from * (12 st)
In Green
- 15: 12 sc (12 st)
16: 6 sc decrease (6 st)
17: 4sc 2x(sc decrease) (4 st)
cast off.
Also I have a youtube account now and Plan to make basic tutorial videos like the FPDC stitch for example. I'll keep you's updated :)
Sunday, 20 February 2011
Spring!
Over the winter months my creativity has been dead. but now it's brightening up (slighlty as it may be) My creativity is flowing without control, I've been making hats recently and tonight im starting a new piece for yarn bombing using an interesting stitch That I've only used once before.
The pattern I promised may be delayed as there's been a few problems with it but there's annother bubbling inside my head :)
Monday, 17 January 2011
Why Buy Handmade?
In this article i will attempt to alert you to some of the endless reason to buy garments, tools and toys handmade by everyday people like you and I.
As I'm sure you are aware for good quality home made products it can be quite costly, and If you are waiting for your item to be made you can also be waiting a small while for your order.
Many people would ask questions like, 'Why would i want to spend £35 on a handmade top when i could go to the store and get one for £25?' I wouldn't blame somebody for asking this question, especialy in the times we live in, Jobs are hard to come by and people are saving every penny just to get by!
Now by no means am I suggesting that everything in your wardrobe and yout house should be handmade, definitely not, nobody can afford to buy everything handmade.
Handmade clothing Is made on the small scale thus original and you will most likely never come accross somebody with the same garment of clothing as you whereas store bought is mass produced and very popular making it hard for you to avoid seeing people with the same clothes as you.
store bought clothes are lovely yes and I'm not saying there's anything wrong with them other than the fact everybody has them, but would you rather be remember as 'that guy/girl with the same top as me,' or 'that guy/girl with the really interesting outfits'
as awesome as this is, it's a fine example of mass produced style and no individuality:
Since the dawn of trade, sellers have followed the cheap labour, which unfortunately in todays world means that there are children in third world countries working for pennies, although many spokespeople for major company's will deny any involvement with these factories, in many cases they turn out to be knee deep in what may aswell be slave labour.
with handmade clothes, you know exactly where your product came from, who made it and how much they will be getting paid for that item, which is great knowing for definite that you are not supporting child labour.
With handmade items generaly are more expensive that those mass produced, you have to take into account what it is you're paying for:
Materials, the people selling their handcrafted wares will most likely not be buying thier materials in bulk so will be paying public rates which can be quite pricey.
Originality, The item being sold will be of their own imagination and they will have spent endless hours planning, sketching measuring and editing this particular design and probably maybe a few prototypes which is more time and materials used.
Time, as the products are handmade the crafter will have spent hours working away on your purchase, whilst it will be doing something they enjoy, it's still time of their life they have spent to make this for you.
you have to take all these facors into account when thinking about the price of a handmade product.
I hope you enjoyed reading this, i spent a lot of time writing this and if this changes at least one person's opinion of handmade goods then that's my aim completed.
I hope everybody is having a great year so far, I have a new pattern to post for you's I was going to post a different one but i figured this one would be better
speak to you's soon bye :)
As I'm sure you are aware for good quality home made products it can be quite costly, and If you are waiting for your item to be made you can also be waiting a small while for your order.
Many people would ask questions like, 'Why would i want to spend £35 on a handmade top when i could go to the store and get one for £25?' I wouldn't blame somebody for asking this question, especialy in the times we live in, Jobs are hard to come by and people are saving every penny just to get by!
Now by no means am I suggesting that everything in your wardrobe and yout house should be handmade, definitely not, nobody can afford to buy everything handmade.
Handmade clothing Is made on the small scale thus original and you will most likely never come accross somebody with the same garment of clothing as you whereas store bought is mass produced and very popular making it hard for you to avoid seeing people with the same clothes as you.
store bought clothes are lovely yes and I'm not saying there's anything wrong with them other than the fact everybody has them, but would you rather be remember as 'that guy/girl with the same top as me,' or 'that guy/girl with the really interesting outfits'
as awesome as this is, it's a fine example of mass produced style and no individuality:
Since the dawn of trade, sellers have followed the cheap labour, which unfortunately in todays world means that there are children in third world countries working for pennies, although many spokespeople for major company's will deny any involvement with these factories, in many cases they turn out to be knee deep in what may aswell be slave labour.
with handmade clothes, you know exactly where your product came from, who made it and how much they will be getting paid for that item, which is great knowing for definite that you are not supporting child labour.
With handmade items generaly are more expensive that those mass produced, you have to take into account what it is you're paying for:
Materials, the people selling their handcrafted wares will most likely not be buying thier materials in bulk so will be paying public rates which can be quite pricey.
Originality, The item being sold will be of their own imagination and they will have spent endless hours planning, sketching measuring and editing this particular design and probably maybe a few prototypes which is more time and materials used.
Time, as the products are handmade the crafter will have spent hours working away on your purchase, whilst it will be doing something they enjoy, it's still time of their life they have spent to make this for you.
you have to take all these facors into account when thinking about the price of a handmade product.
I hope you enjoyed reading this, i spent a lot of time writing this and if this changes at least one person's opinion of handmade goods then that's my aim completed.
I hope everybody is having a great year so far, I have a new pattern to post for you's I was going to post a different one but i figured this one would be better
speak to you's soon bye :)
Friday, 31 December 2010
Happy New Year
And so another year closes, I myself can say that I'm glad to see it go :)
i home everybody has a good night and stays safe :)
Happy New Year!!
i home everybody has a good night and stays safe :)
Happy New Year!!
Friday, 24 December 2010
Merry Christmas.
I hope everybody has a good Christmas tomorrow and I would like to apologise for the lack of activity and I promise come the new year I will focus my full attention on this blog and I will haw more patterns ad will start selling some stuff on etsy :)so please if there's anything you want to see, any patterns you'd like to see let me know :)
Merry Christmas everybody!
Monday, 29 November 2010
lastest yarn bomb.
this piece was done outside a friend of mine's house and as i was sewing it up an old woman, possibly about 90 and as she drove past she started beeping her horn frantically i don't know if she done this on purpose or not but here it is:
this one's a lot longer than the first one I made, and it has some horrible furry yarn, it's nice but god i hate working with it.
Sunday, 7 November 2010
Just an update
Ok guys it's not been this cold in Scotland in a long time it's unimaginably cold outside.
So I'm just sitting on my bed warming up, crocheting my next piece for yarn bombing it's gonna be annother lamp post but I don't know where to put it, somebody suggested I go around all my neighborhood but i'm not sure, should I go around my town leaving street cozies here an there or do my neighborhood then branch out? I'm also looking forwrd to doing my first tree also but first I need to decide on a tree and size it up.
And my tomorrow I'll post my pattern for the crochet anna-varney cantodea it's not that great but hopefully the rest of my patterns will be better as I prefer making goofy animals rather than human like creatures
So I'm just sitting on my bed warming up, crocheting my next piece for yarn bombing it's gonna be annother lamp post but I don't know where to put it, somebody suggested I go around all my neighborhood but i'm not sure, should I go around my town leaving street cozies here an there or do my neighborhood then branch out? I'm also looking forwrd to doing my first tree also but first I need to decide on a tree and size it up.
And my tomorrow I'll post my pattern for the crochet anna-varney cantodea it's not that great but hopefully the rest of my patterns will be better as I prefer making goofy animals rather than human like creatures
Saturday, 6 November 2010
Happy Belated Halloween

Hey Guys i hope everybody had an amazing halloween, and yeah sorry this entry's like a week late, but i've been busy busy busy.
I crocheted a little miniature anna-varney cantodea. I wrote the pattern down but it didn't turn out nearly as well as i hoped, but i think i'll post it anyway.
Also I've been busy yarn Bombing :)
This is the first piece of yarn bombing i've ever done, it was mainly crocheted with a little bit a knitting in the middle, it was all crocheted with a knitting needle as i lost all my crochet hooks except for my 2.5 and 3.5 hooks which would take me ages to make a simple piece this this haha.
Subscribe to:
Posts (Atom)
.jpeg)